Correctly fill out and submit Become A Partner (BAP) application form
Create password and login
Comparison of permission role based on BAP application status
Inquire BAP application status
Lesson 1 Apply BAP | Session 1 Navigation
Fill out and submit form – when you submit a form upGrad GSP initially assesses your application. From this point, you will be granted upGrad GSP App access but with limited features where you can monitor your application status.
Login and view the progress of your application
Get an approval – If GSP completely approves your application then you can start managing your organisation.
In the header bar, click on ‘Recruitment‘. This link will navigate you to the Recruitment Partners info page.
2.1 Then click on ‘Become a upGrad GSP Partner‘ button on the top banner.
3
The Become a Partner Wizard is composed of 4 sections, namely:
Company Details
Company Branches
Company Profile
The tab in teal color determines which section you are in. The image below means you are in Company Details section.
3
4
Click the question mark icon to see a brief introduction on:
How upGrad GSP plays a vital role in connecting students to trusted Recruitment Partners?
The strict approval process
4.1 This is the brief introduction which comes in a modal. When you are done reading this, click “Continue” button to remove and proceed to filling out the registration form.
Lesson 1 Apply BAP | Session 2 Company Details
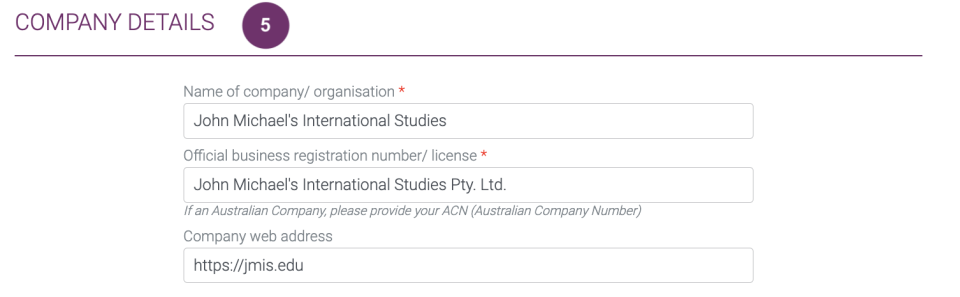
5
The Company Details is chunked into 4 parts:
Company Details
Home Office Address
Company Primary Contact
Company Specifics
If you can’t answer all the fields for now, just make sure to answer the required fields. Required fields are those with red asterisks (*) after the field name. You won’t be able to proceed to the next section if you leave at least one required field blank.
In case you forgot to answer any required fields in this page and you clicked ‘Next’, the page will show you the fields you need to complete with error messages.
5
6
Fill out the Head Office Address. Your answers here will be displayed as your main address in case you have other branch offices.
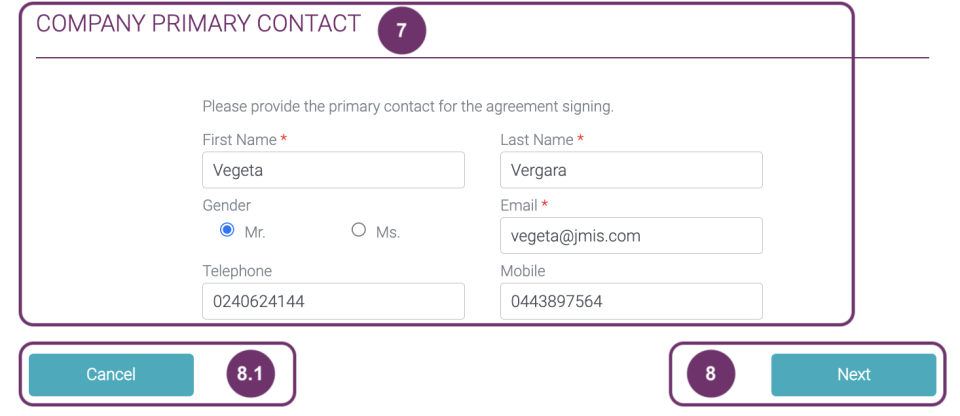
7
Fill out the Company Profile Contact. The name of the person here shall be the person that upGrad GSP will contact for agreement signing. This might be the highest ranking person in your company or the manager in your department.
The email address here will be the account that will be used when your application got an initial approval from upGrad GSP. You will need this account to login and complete your application.
Format for email address should be xx@xx.xx or xx@xx.xx.xx (e.g., vegeta@jmis.com)
7
8
If you are all fine with your answers, click “Next” button to proceed.
8.1 If you want to cancel this registration, click ‘Cancel’ button. Please note that when you click ‘Cancel’ button, all your answers will be lost without any warning and you will be redirected to a login page where only registered users can log in.
Lesson 1 Apply BAP | Session 3 Agency Specifics
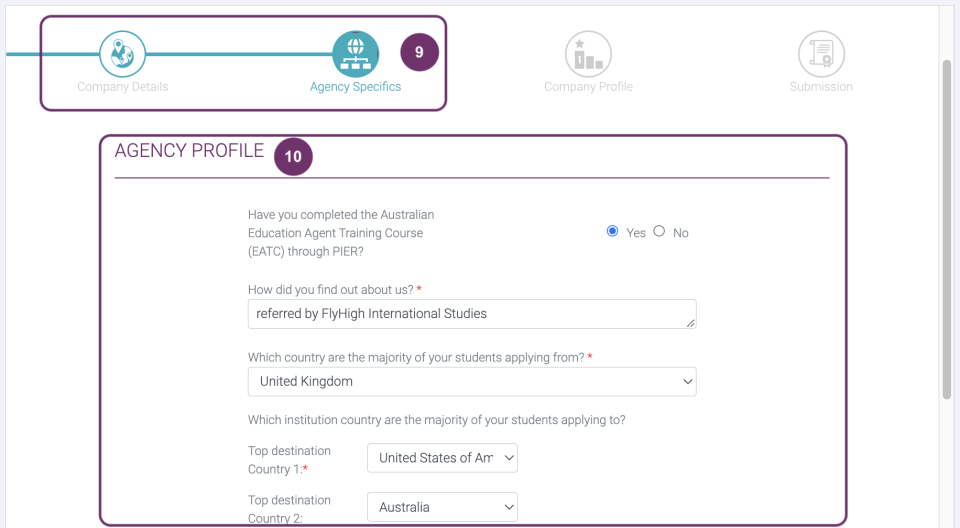
9
Notice that the ‘Agency Specifics’ is now also colored and a line extended to it. This means that you are filling out fields under ‘Agency Specifics’, two more to go to submit your application.
You can click the colored ‘Company Details’ if you want to go back.
9
10
Agency Profile gives upGrad GSP an overview of your student clients and the status of taking EATC through PIER
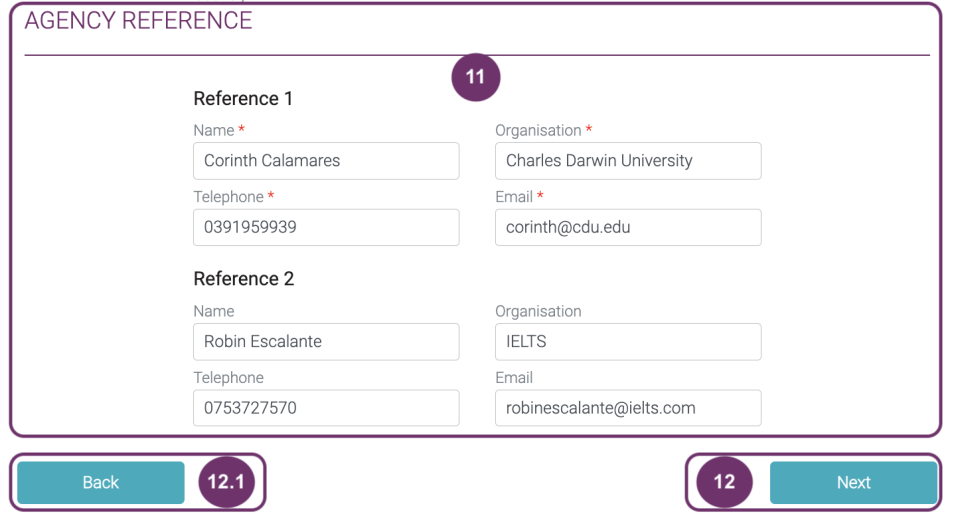
11
References allows upGrad GSP make a quick background check which will be helpful in your application.
11
12
If you are all fine with your answers, click “Next” button to proceed.
Image12.1 Click this if you want to go back to “Company Details” section. This is another way of going back other than clicking Company Details circle above.
Notice that the ‘Agency Specifics’ is now also colored and a line extended to it. This means that you are filling out fields under ‘Agency Specifics’, two more to go to submit your application.
You can click the colored ‘Company Details’ if you want to go back.
13
14
This is a copy of your business license which may be issued by your local government unit about the legal operations of your organisation.
14.1 Drag the file in the grey area so you can upload the file. You can also click the grey area so you can check in your computer where you can select the document from.
Note: Documents must be of type .doc, .docx, .xls, .xlxs, .png, .jpeg, .jpg, .pdf, .txt, .zip. File size max 5 MB
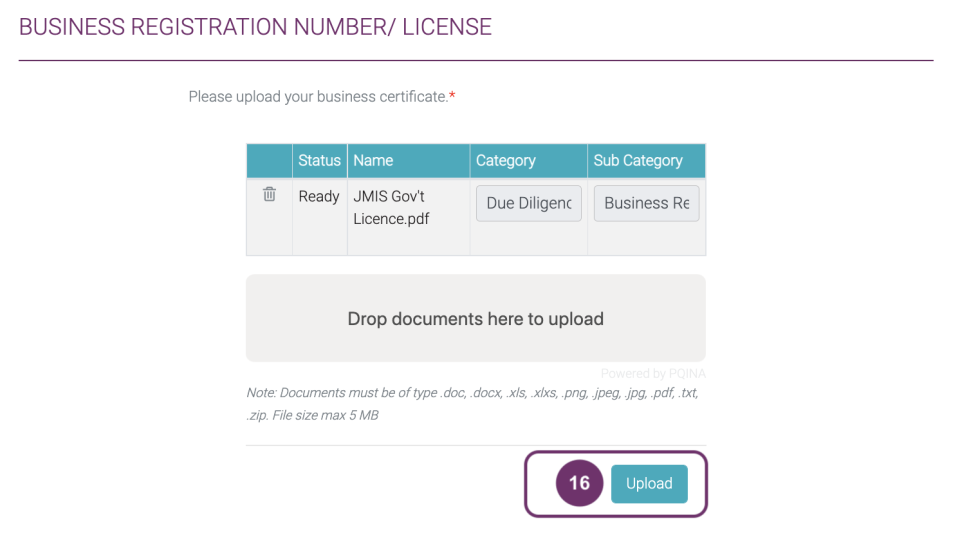
15
A table will appear displaying the document you just uploaded.
Trashbin – click this if you want to delete the file Status = Ready means file is ready to be uploaded
Name is the document name
Category and Sub Category are system generated
You can drop more files as necessary by dragging them to the grey area where “Drop documents here to upload”
Click the square beside the I’m not a robot for security purposes and continue.
15
16
Click Upload button to attach the document in your application.
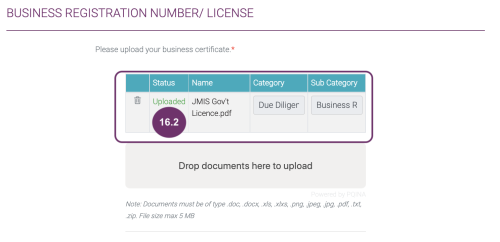
16.1 This pop will be displayed once the uploading of document(s) has been successful.
16.2 Notice that the status has been changed to ‘Uploaded’. This means that the documents has been attached to your application. You can still delete this by clicking the trash bin.
17
You should also submit a Company Profile Document that has the following information:
number of offices,
type of offices (fully owned, franchised, partnered, sub agent, etc.) either actual or in the case of a startup, proposed.
Note: Documents must be of type .doc, .docx, .xls, .xlxs, .png, .jpeg, .jpg, .pdf, .txt, .zip. File size max 5 MB At this point, it is not mandatory to be submitted. If you are ready to attach the document, follow the previous steps.
17
18
If you are all fine with your answers, click “Next” button to proceed.
18.1 Click this if you want to go back to “Agency Specifics” section. This is another way of going back other than clicking Agency Specifics circle above.
19
Notice that the ‘Submission’ is now also colored and a line extended to it. This means that you are filling out fields under ‘Submission’. This is the last before submitting your application.
19
20
Click “Terms & Conditions and Privacy Policy” to read in full details. Click the square beside it if you agree. Click also the square beside the “I’m not a robot” to proceed. A simple test may appear which you need to answer correctly to prove you are not a robot for security purposes. But if the simple test did not appear, it’s also fine.
20.1 This is what it looks like if all goes well in this last section.
21
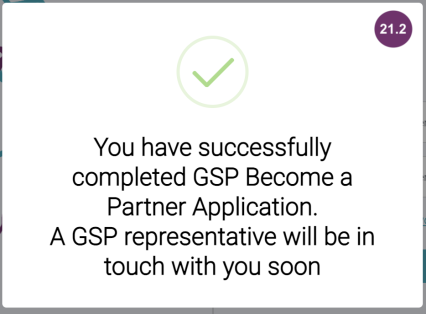
If you are all fine with your answers, click “Finish and Submit” button to proceed.
21.1 You can always go Back or click any of the Sections above to review your answers before submitting.
21
21.2 You can always go Back or click any of the Sections above to review your answers before submitting.
Lesson 2 BAP Agent Role | Session 1 Create Password
1
You shall receive 2 emails after submitting your Become a Partner Application.
One email acknowledges your application and some information at the bottom on ways how to connect with us.
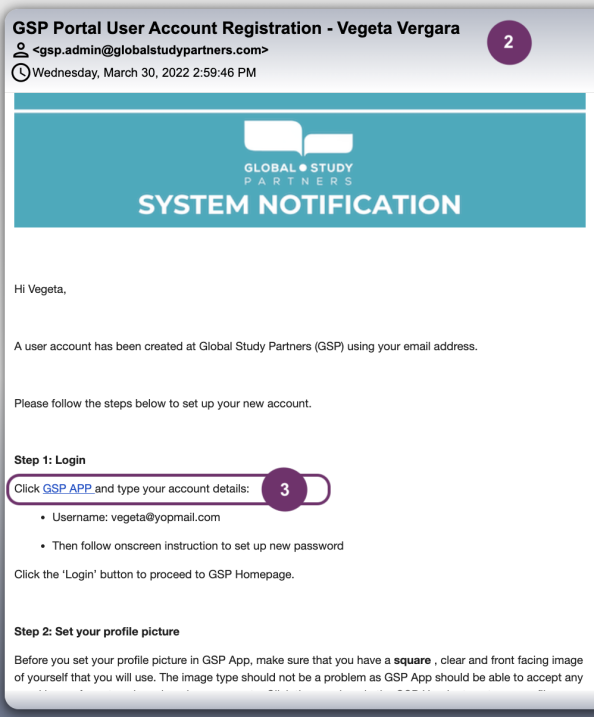
2
Another email should have a title ‘upGrad GSP Portal User Account Registration – <Your complete name>. Name is what you have provided in the Company Primary Contact. This email has instructions on how to:
log in (initially by creating password)
set your profile picture
2
3
As mention in the email, click ‘upGrad GSP APP’. It is a link that will redirect you to create your password.
4
Type your password twice. The second field, ‘Re-enter your password’ validates if you have remembered your password correctly. So, these should match. Password should have the following criteria:
at least 8 characters
combination of small & big letters and numbers
use special characters like ‘@’ to make your password more secured
4
5
Once you are done entering your password, click ‘Submit’ button.
6
A pop will be displayed confirming that you have successfully created your upGrad GSP password. Click ‘OK’ to go to the login screen.
6
If you are seeing this message it means that the email was sent to you over 24 hours ago. You may try ‘Forgot Password’ feature in the Login Page to attain a new email. Learn how to use Forgot Password feature.
Lesson 2 BAP Agent Role | Session 2 Login
1
Go to Login Page and input your credentials correctly, username and password.
A pop will be displayed confirming that you have successfully created your GSP password. Click ‘OK’ to go to the login screen.
2
3
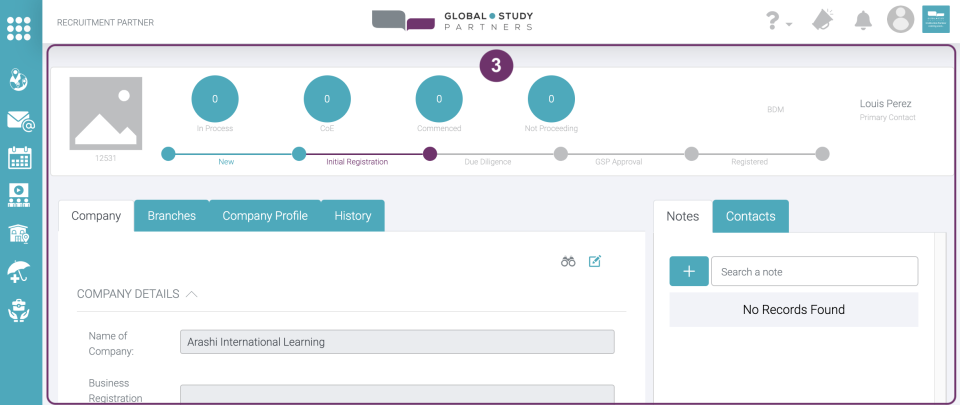
Upon log in, you should be redirected to Recruitment Partner page where you can see all the details you have input when you were doing the Become A Partner application. Your application is in Initial Registration Stage. You can only freely navigate on this but you cannot make any changes to the details of your BAP application.
Lesson 2 BAP Agent Role | Session 3 Comparison of Features
4
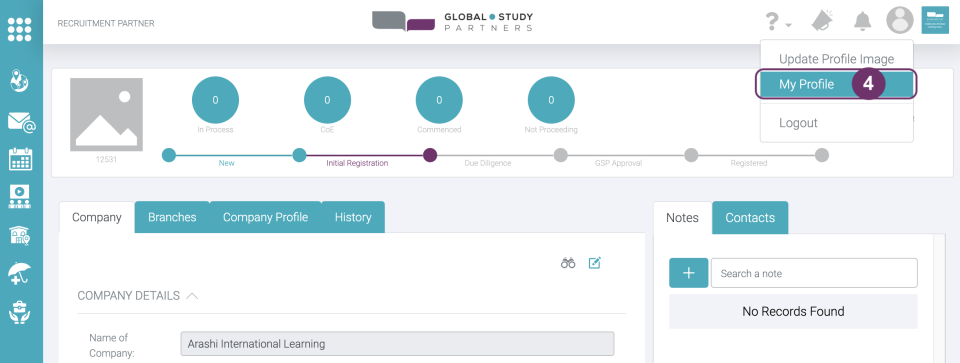
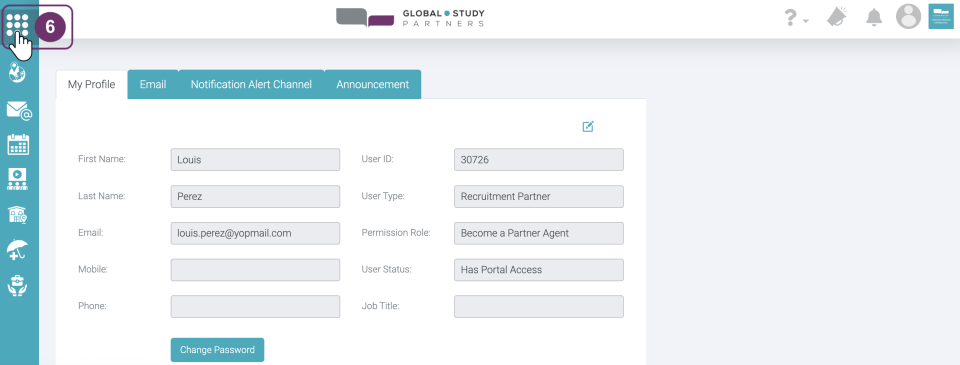
To understand more of why you have limited access, go to My Profile .
4
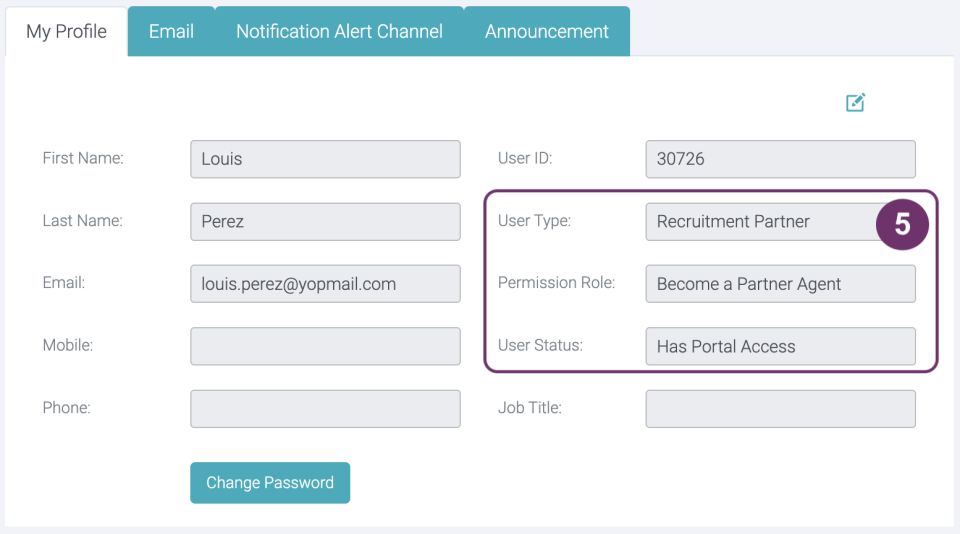
5
Since your BAP Application is still in process, you were given this certain access with the details below. This will change in the future depending on the result of your application, that is if approved or rejected.
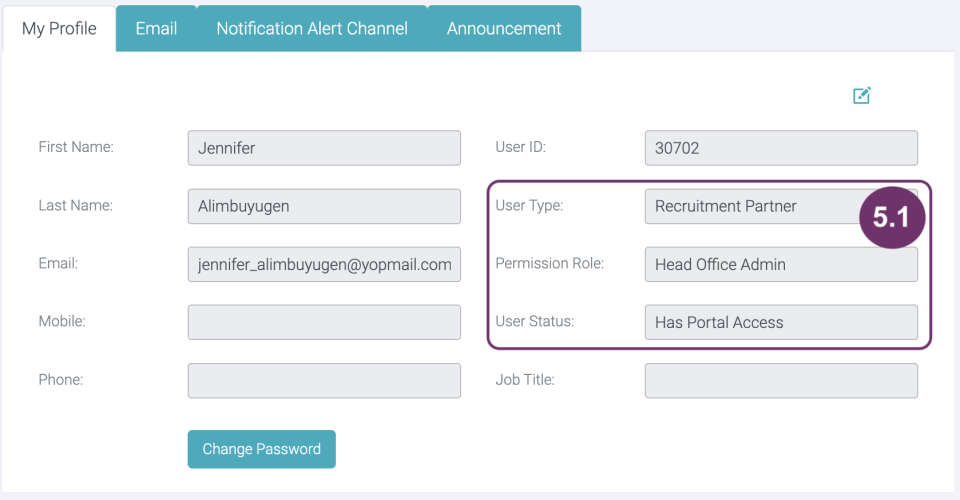
5.1 A BAP application that was already fully approved, will have the Company Primary Contact as the Head Office Admin by default that has full access to upGrad GSP features. Such Profile should have these details below. However, no one will be able to access upGrad GSP App if at any point your BAP application has been rejected.
6
Check out all the features your can access by clicking the 9-dot icon at the top left.
6
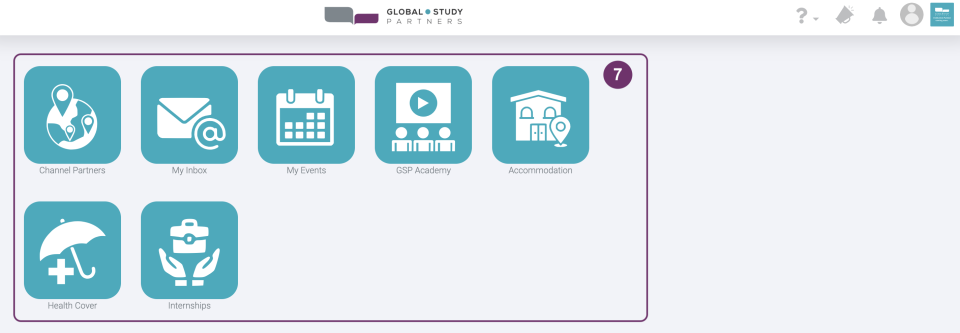
7
Here’s what it look like if you have limited access while your BAP Application is still in process.
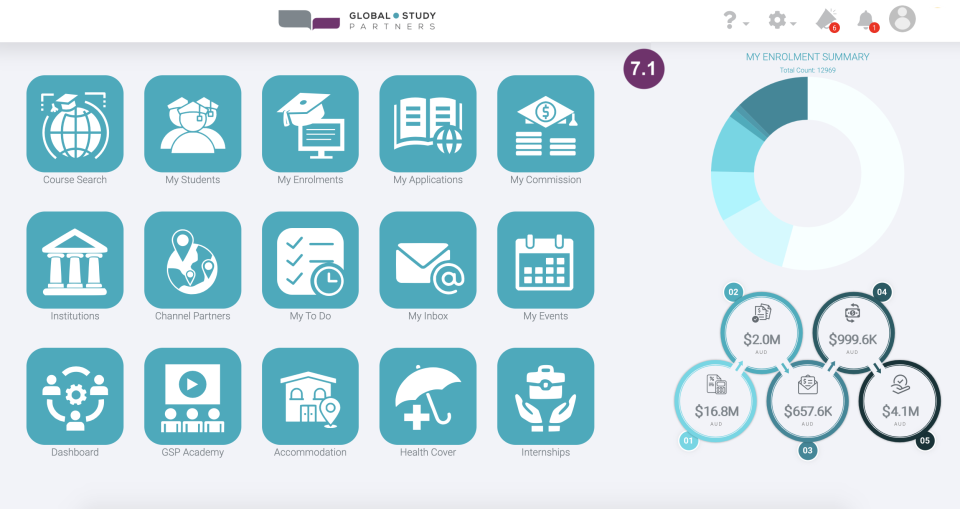
7.1 Here’s having a full access looks like. Certainly you can do more, more menus accessible on the left and rich in data statistics/ performance on the right.
8
Click Channel Partners to go to your Company Record Page and see the difference of having a limited access compared to having a full access.
8
9
Limited access while your BAP Application is in process means you can only access these 6 features:
Company and Company Profile – details based on your input in the BAP Application
Branches – By default the Head Office Address you input in the BAP Application will be made the Head Office that is why it is by default listed in the Branches.
History – Any important changes that has been made like updates in the status or changes in the details will be chronologically listed here.
Notes – some important reminders
Contacts – special people who are not part of your recruitment team but needs to be known
9.1 Additional features will be accessible for those who are fully approved:
Document – where you can upload documents for upGrad GSP Admin to see
Cases – pending tasks waiting for you or upGrad GSP Admin to be fulfilled
Team – counsellors per branch that you have and their respective access level.
Lesson 2 BAP Agent Role | Session 4 Inquire BAP Application Status
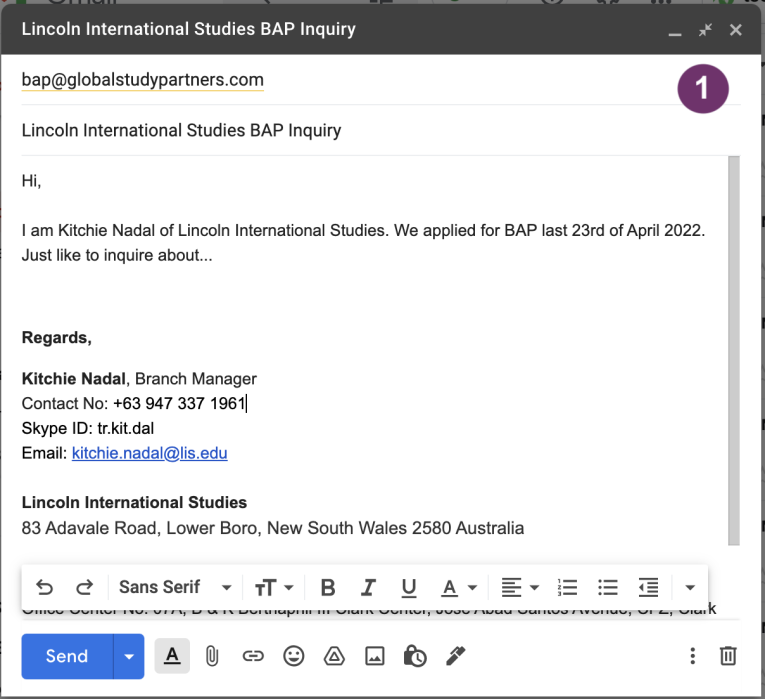
1
If at any point you would like to ask the progress or status of your BAP Application, send an email to