upGrad GSP Assessment Tool

Lessons 1 - 2

Learning Objectives:

  • Location of the new feature Assessment Requirement
  • Update status of Assessment Checklist

Pre-Requisite

  • Course Search which can be learned in the following links:
    • Course Search
    • Enrolment Wizard
    • Manage Documents

In the ‘Homepage Menu‘, go to the main object where you want to see all the requirements for a specific course ‘Course Search’.

Lesson 1 Course Search | Session 1 View Assessment Requirements

1

In the Course Details Page, click “Requirement” button

2

You will now see the Assessment Requirement. It is a list of all requirements that the student has to complete. With this new feature you can easily track and update the status per requirement. This will be learned on the next sessions. But for now here is a screenshot of what the Assessment Requirement looks like:

Assessment Requirement includes the following types:

  • Academic Entry Requirement
  • English Entry Requirement
  • Exclusion
  • Financial Requirement
  • Form/s Requried
  • GTE
  • Personal

Please note that the specific requirements of each type for each course varies.

If you also do not see something that looks like this, please contact upGrad GSP Admin or your Branch Manager to set this up.

2

Lesson 2 Application | Session 1 View Assessment Checklist

1

When you apply for a course that has Assessment Requirement, you should be able to find this same items in the Application Record Page. The requirement has now become a checklist to easily monitor the progress of each. The status of each requirement in the checklist is also displayed. By default the status of each is “Not started”.

1

2

Click the header of requirement to see full details

Image 2.1 Scroll the container to see all the details it has

Lesson 2 Application | Session 2 Link Documents

1

Click “Link required documents here”. You can also notice that it specifies the category and sub category of the required document. For instance in the example below, Personal > Academic.

2

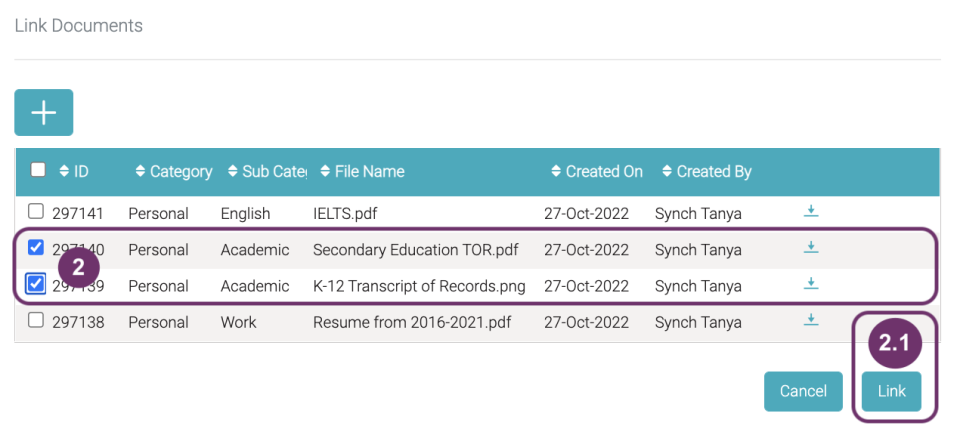
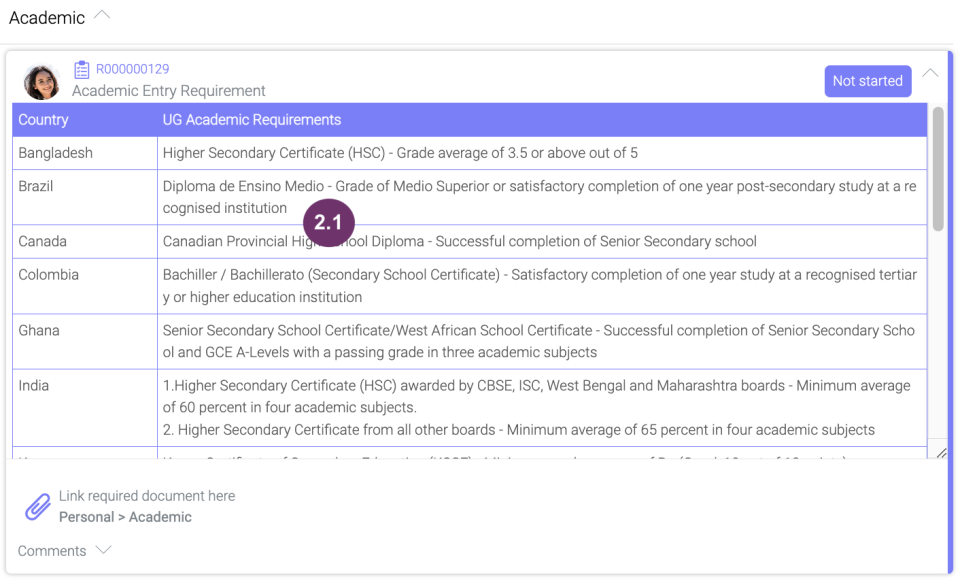
A pop-up will appear displaying all the documents you can link to this requirement. Check all that applies. If the document that you want to link is not yet uploaded in the list, click   to upload document/s.


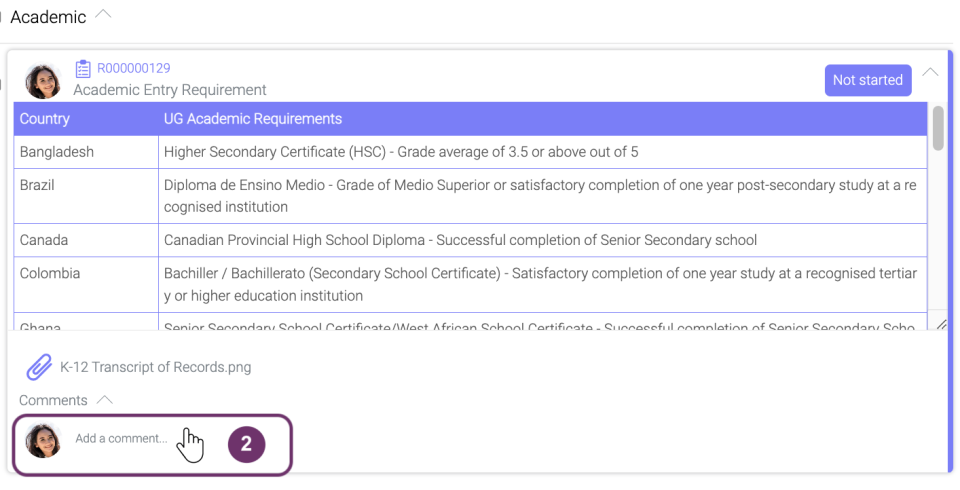
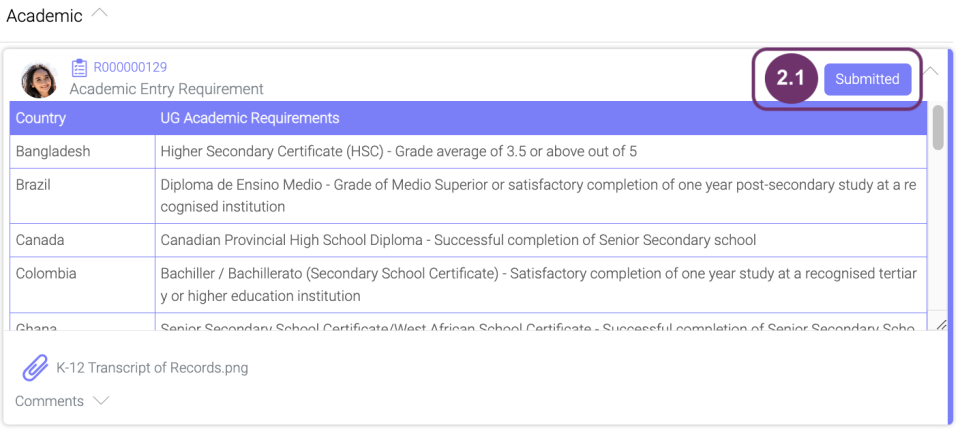
Image 2.1 Click “Link” button to link all the documents you have marked to the requirement

2

Image 2.2 Click “Confirm” button to continue linking the selected document/s. Otherwise, click Cancel.

Image 2.3 Click “Confirm” button to continue linking the selected document/s. Otherwise, click Cancel.

Image 2.4 You should be able to see the document/s linked to the requirements

Lesson 2 Application | Session 3 Unlink Documents

1

You can unlink documents by clicking the same portion where documents linked are listed.

2

Image 2: All linked documents should have this “unlink” icon. Click “unlink” icon pertaining to the document you want to unlink.

2

Image 2.1: Click “Confirm” button to confirm that you want to unlink the selected document.

Image 2.2 A notification appears to confirm that the unlinking of document has been successful.

Image 2.3 The linked document/s should also be removed from the list

Lesson 2 Application | Session 4 Add comments

1

View the requirement in full and click the Comments section

2

Click “Add a comment” so you can start typing

2

Image 2.1 Type comment in the text box

Image 2.2 Click check mark to save the comment or cross mark remove comment.

Image 2.3 Comments on a particular requirement should then be viewable in this section. You can also view here other people’s comment who have access to this. You can only edit and delete your own comment by clicking the edit and trash bin icons.

Lesson 2 Application | Session 5 Update Status

1

Once you are happy with the updates you have made, click “Not started”. You can update the status of each item. In this case, the screenshot below is updating the Academic.

2

Click “Submitted” as the new status of the requirement

2

Image 2.1 The status of the requirement has now been updated to “Submitted”. upGrad GSP People will then review this. You can still put back the status to “Not Started” as necessary.

3

You may have noticed that the progress bar for RP To Do has been updated. Progress bar will continue updating whenever you or the upGrad GSP Personnel make updates.

4

When you change the status of each requirement upGrad GSP Is notified and will attend to it. upGrad GSP Personnel changes the status accordingly. Example of a status by a upGrad GSP Personnel:

4

Image 4.1 When a status is already “In Review” or “Completed” you can no longer update the status. But you can still link documents and make comments. When you click the status, a notification will be displayed:

Lesson 2 Application | Session 6 Filter Viewed Checklist

1

In case you want to view only specific requirement, you can use the filter. Click all the requirements you want to view.

Image 1.1 So now, you can only view the 2 requirements selected. Just click “All” to see all the requirements again.

Image 1.2 The progress bar will also change based on filtered requirements.